Real calls, side by side with what happened next — The Call on the left, Realised on the right. Hover to zoom, click for the full breakdown.
Educational content only. Past chart structure is not a promise of future results. Not financial advice.
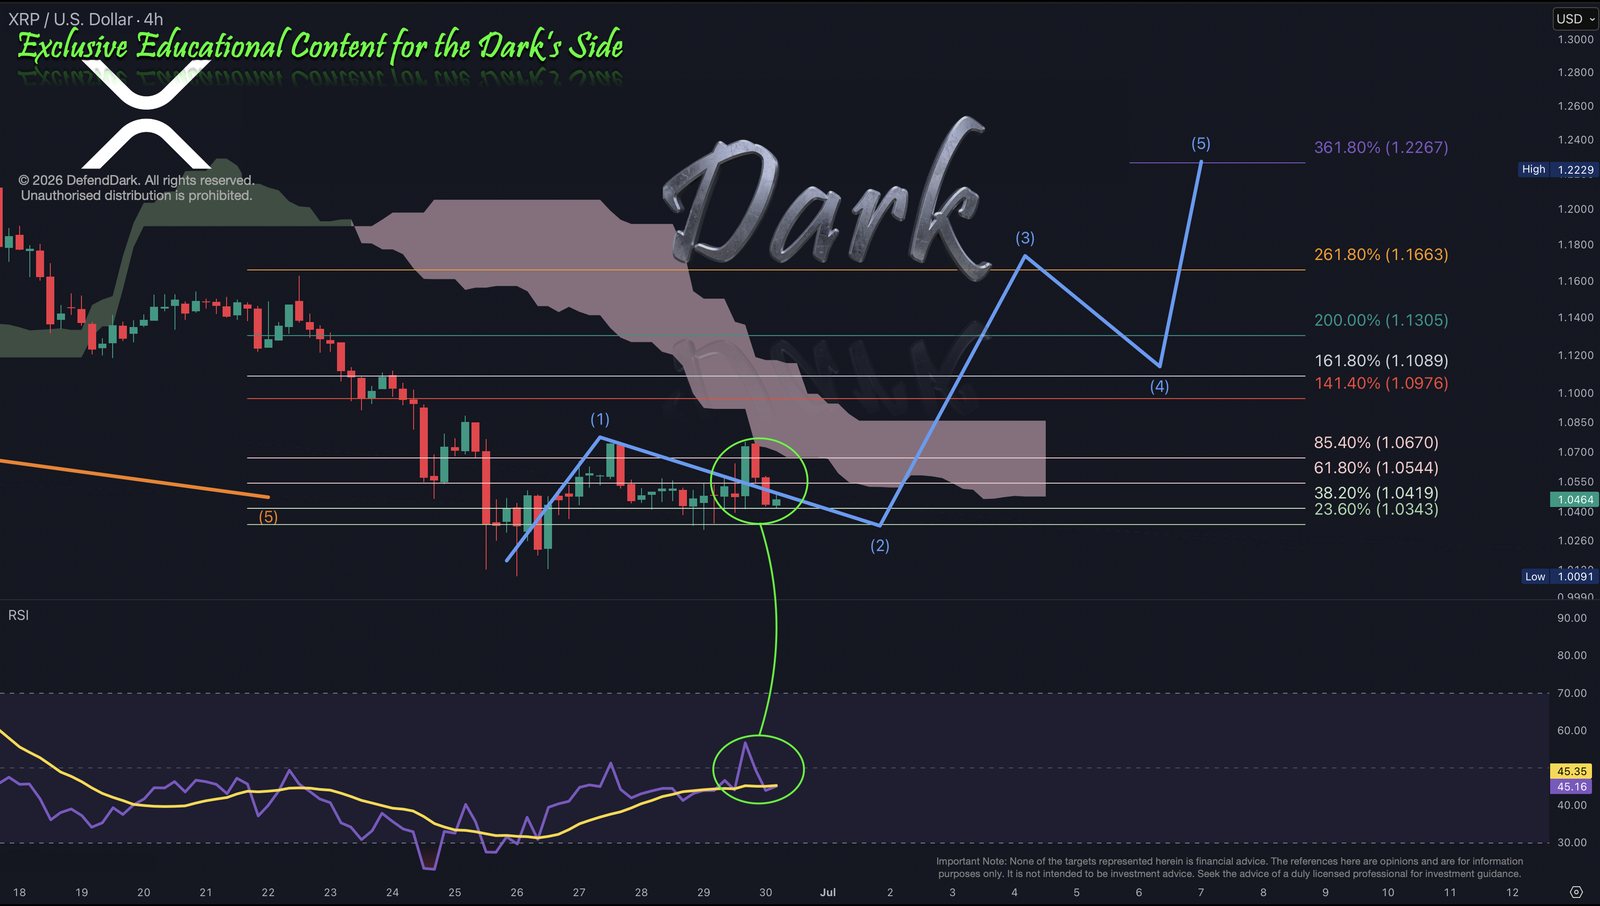
A 4-hour roadmap, unfolding live
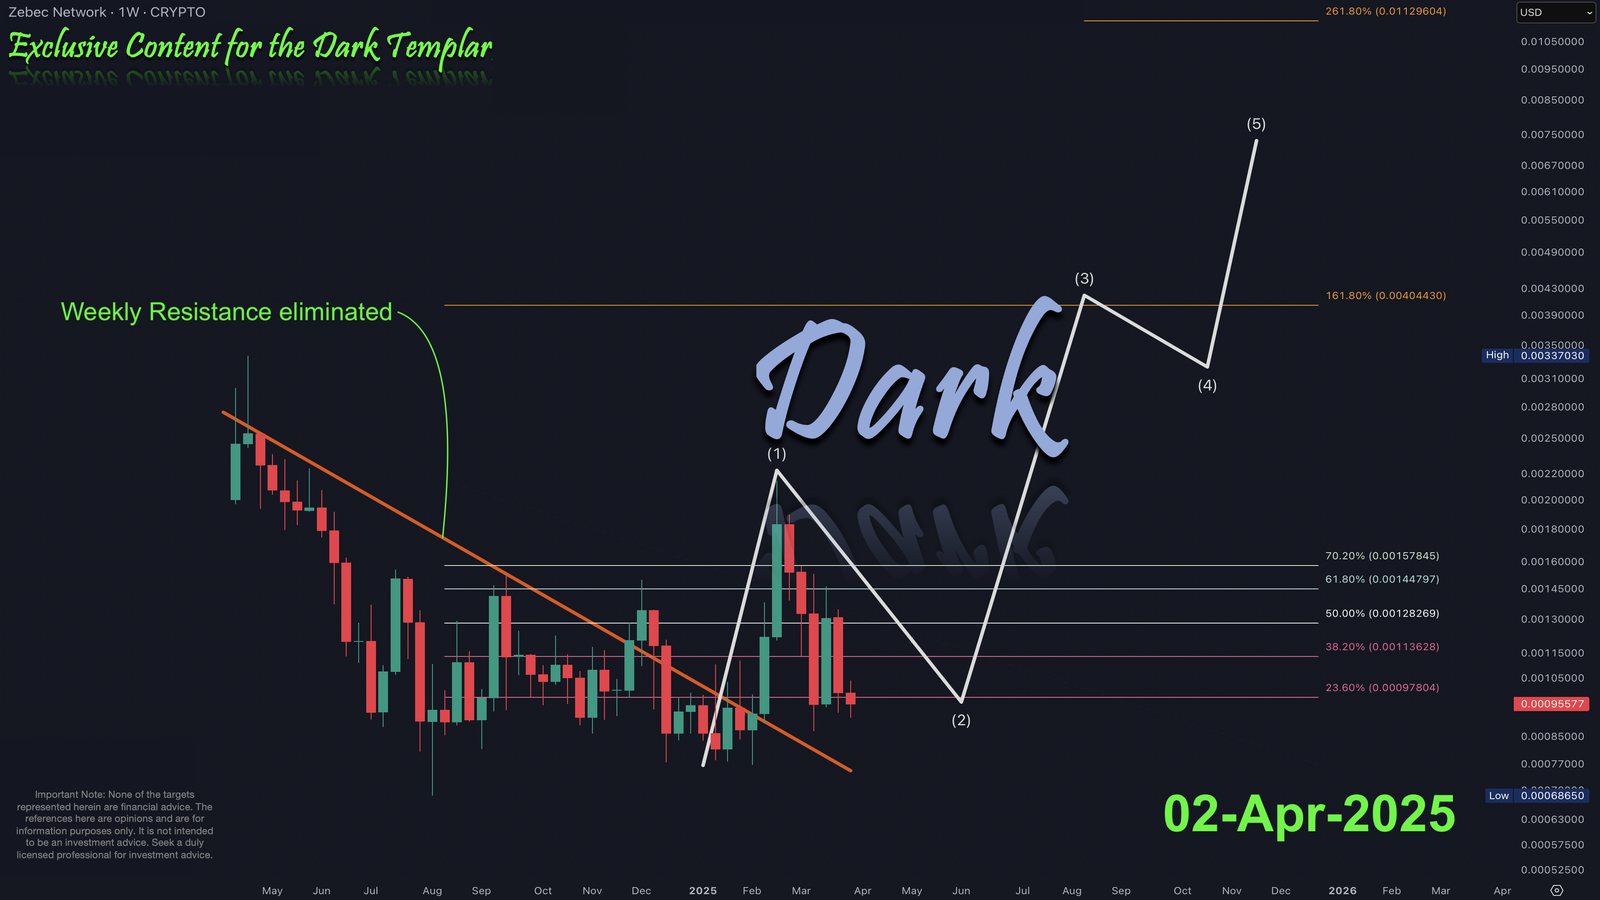
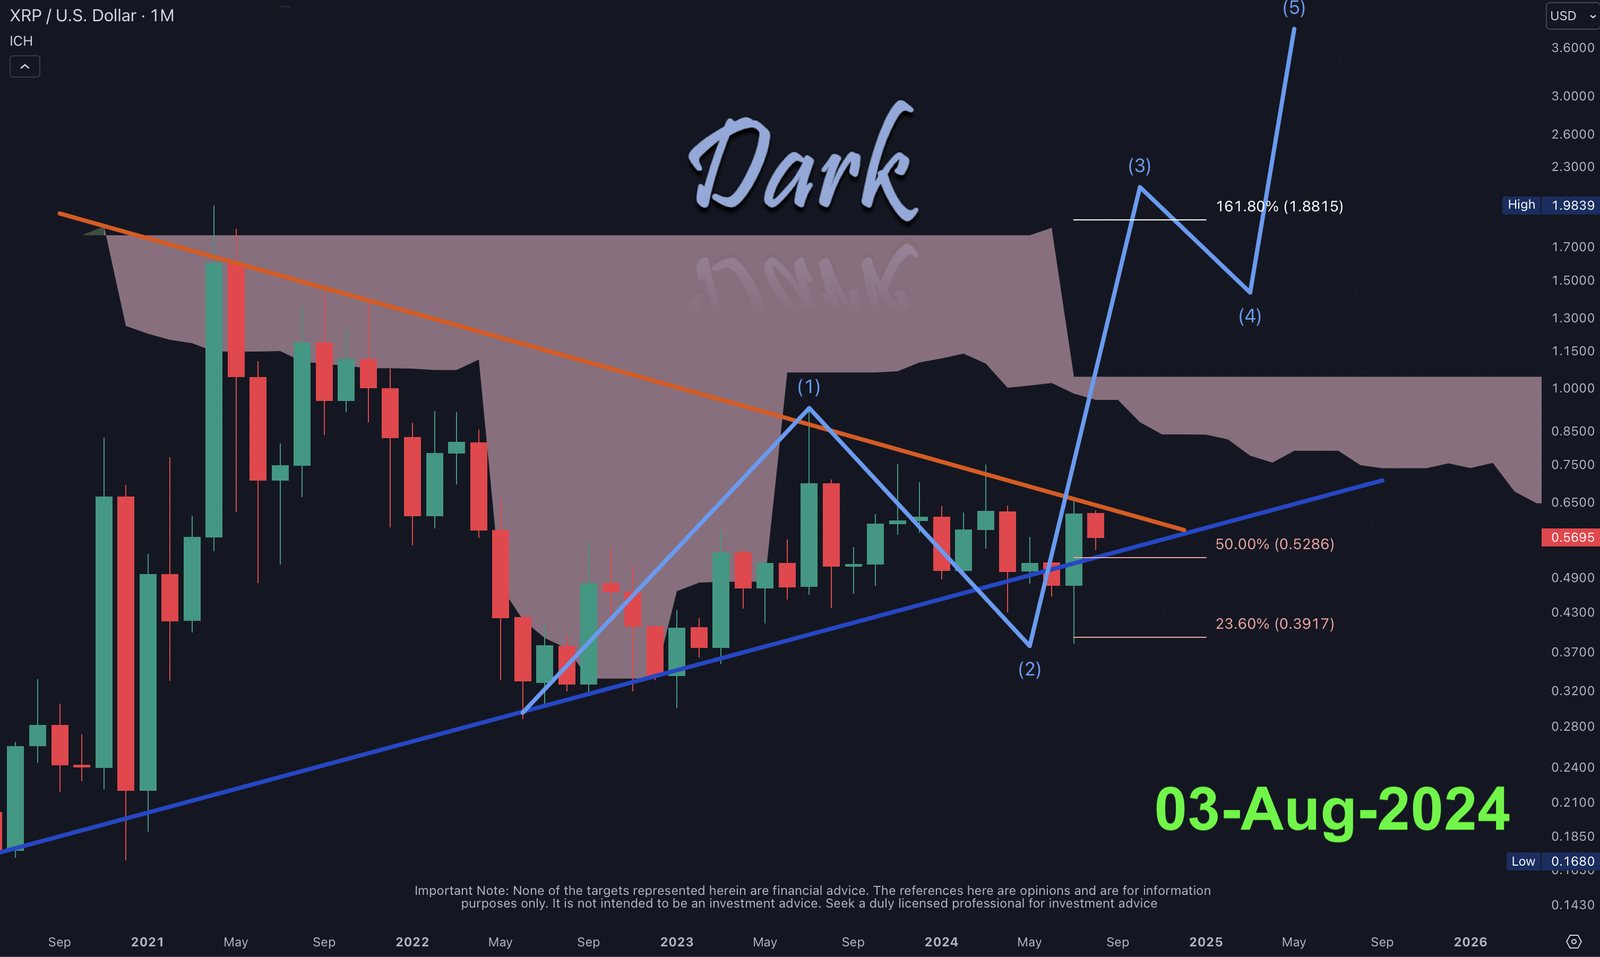
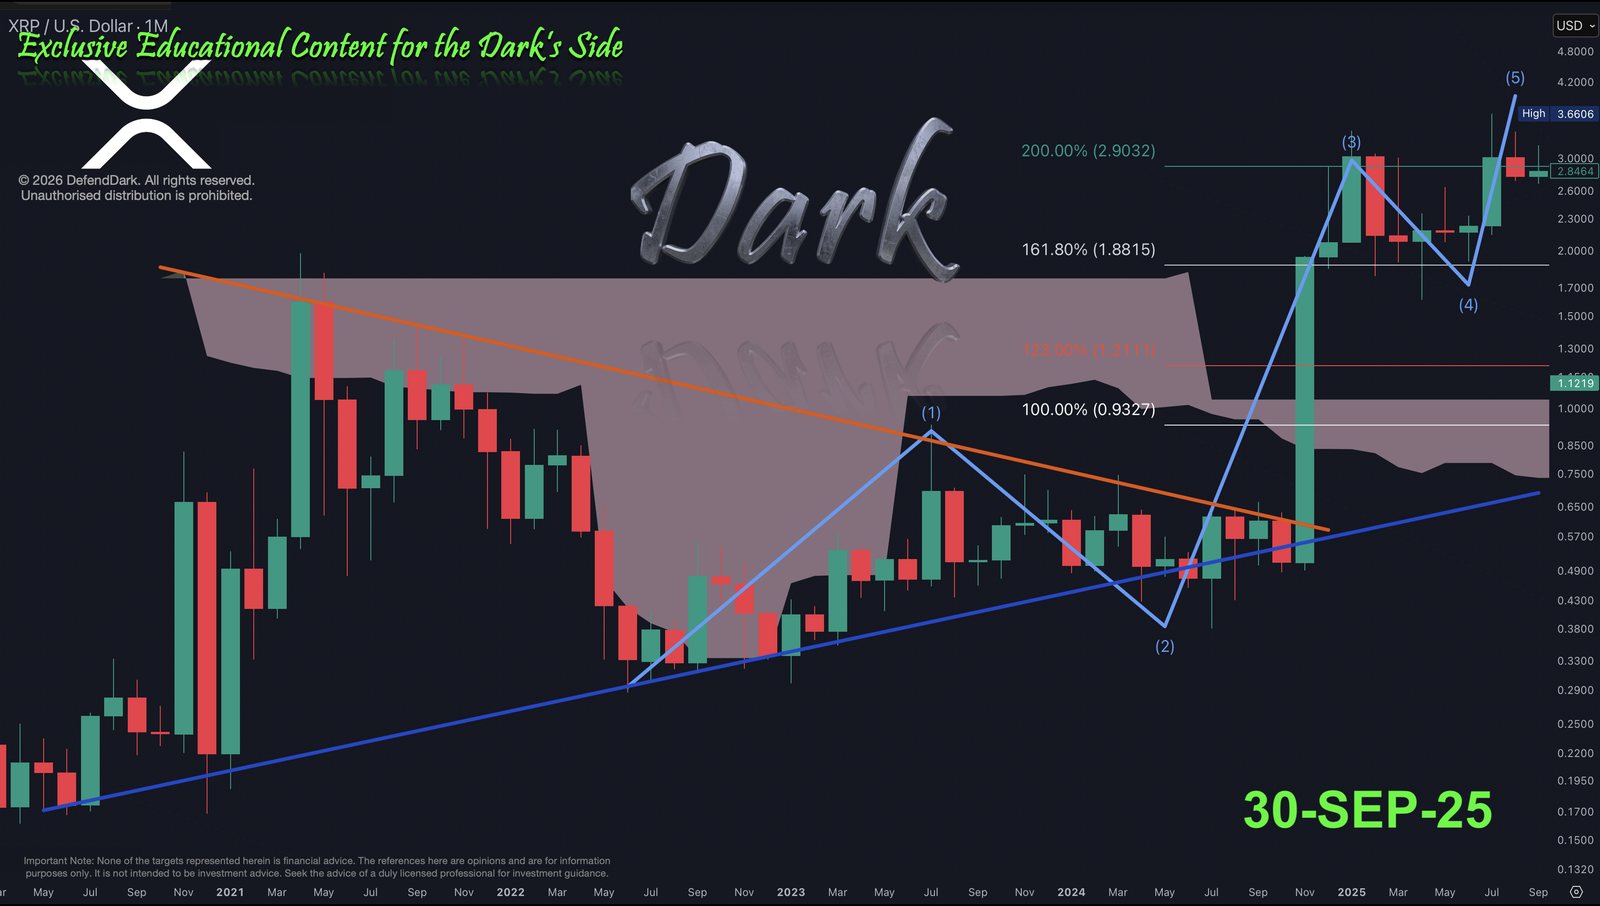
A 14-month Elliott Wave roadmap, tracked to target
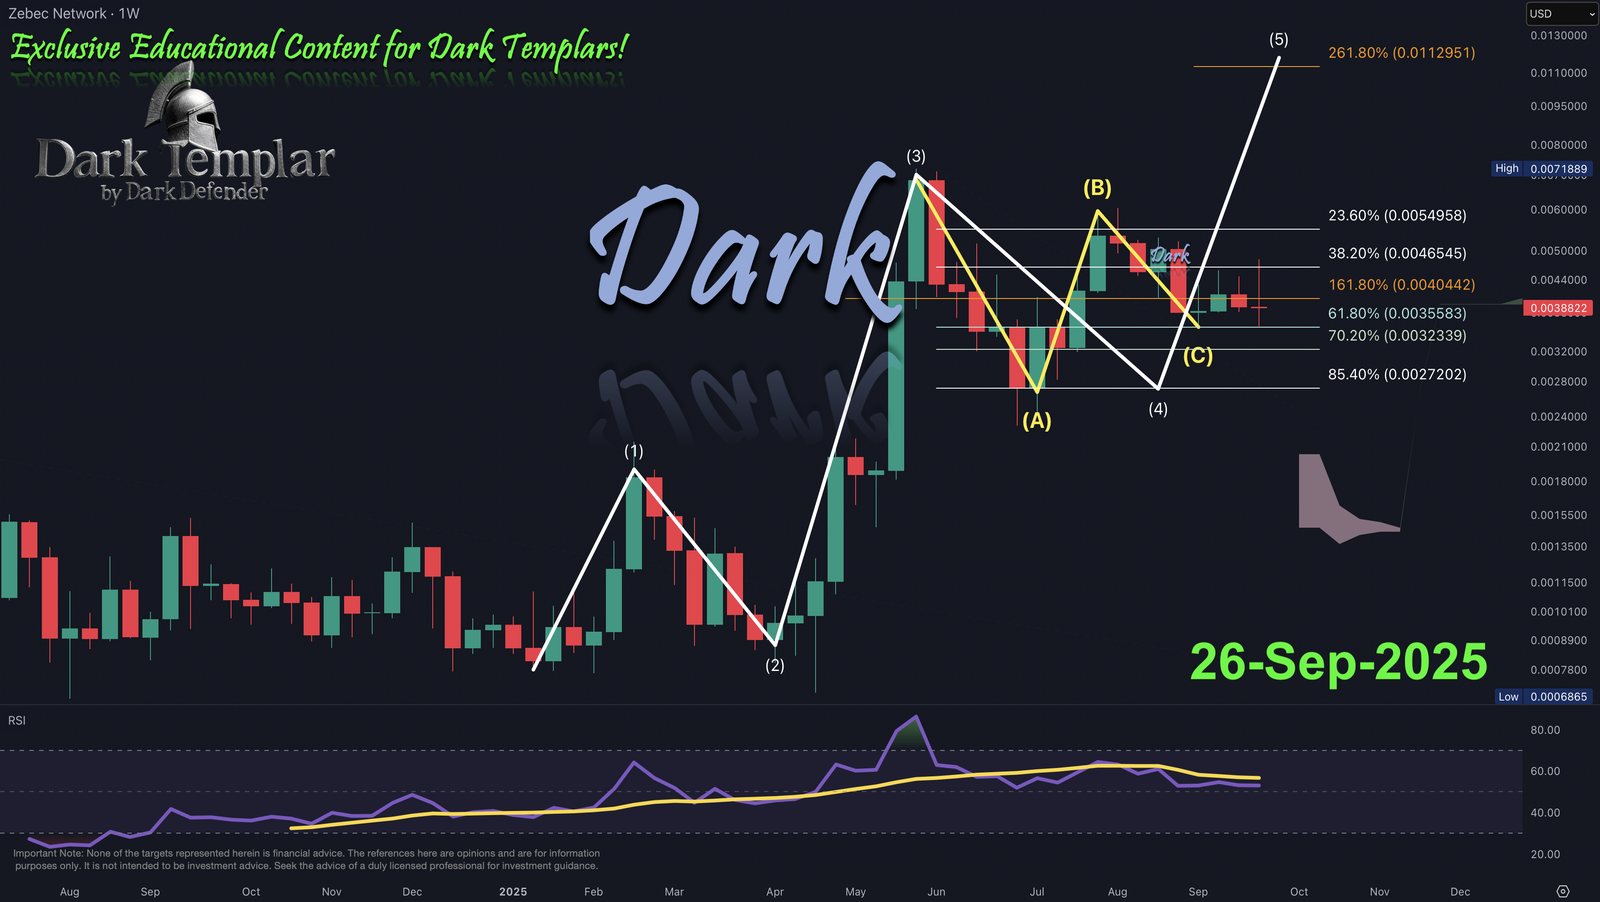
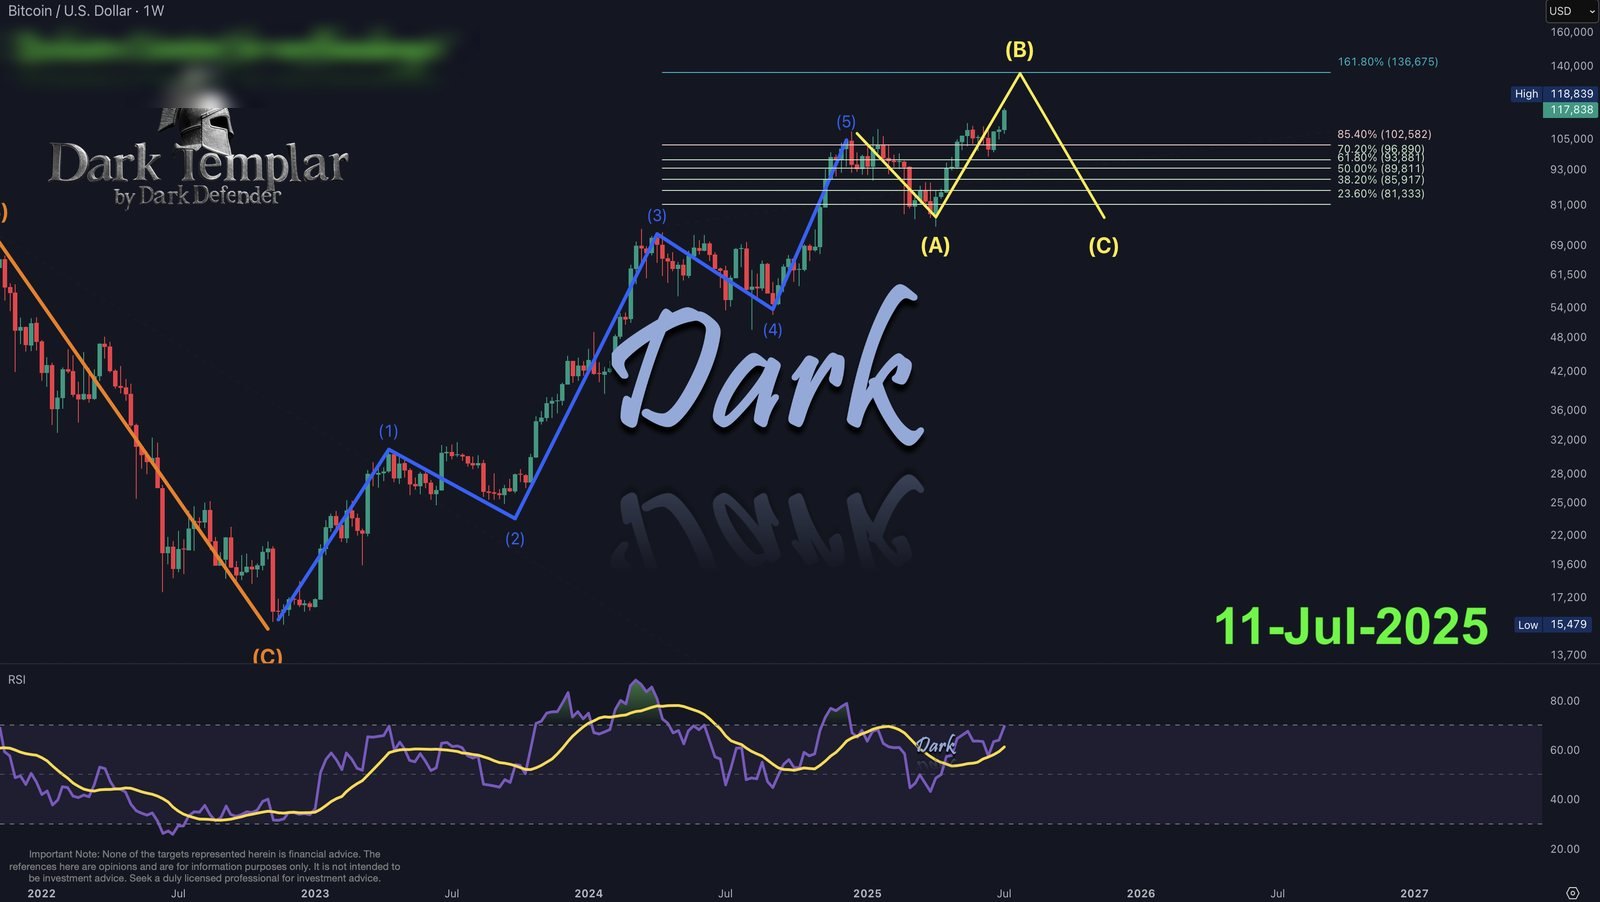
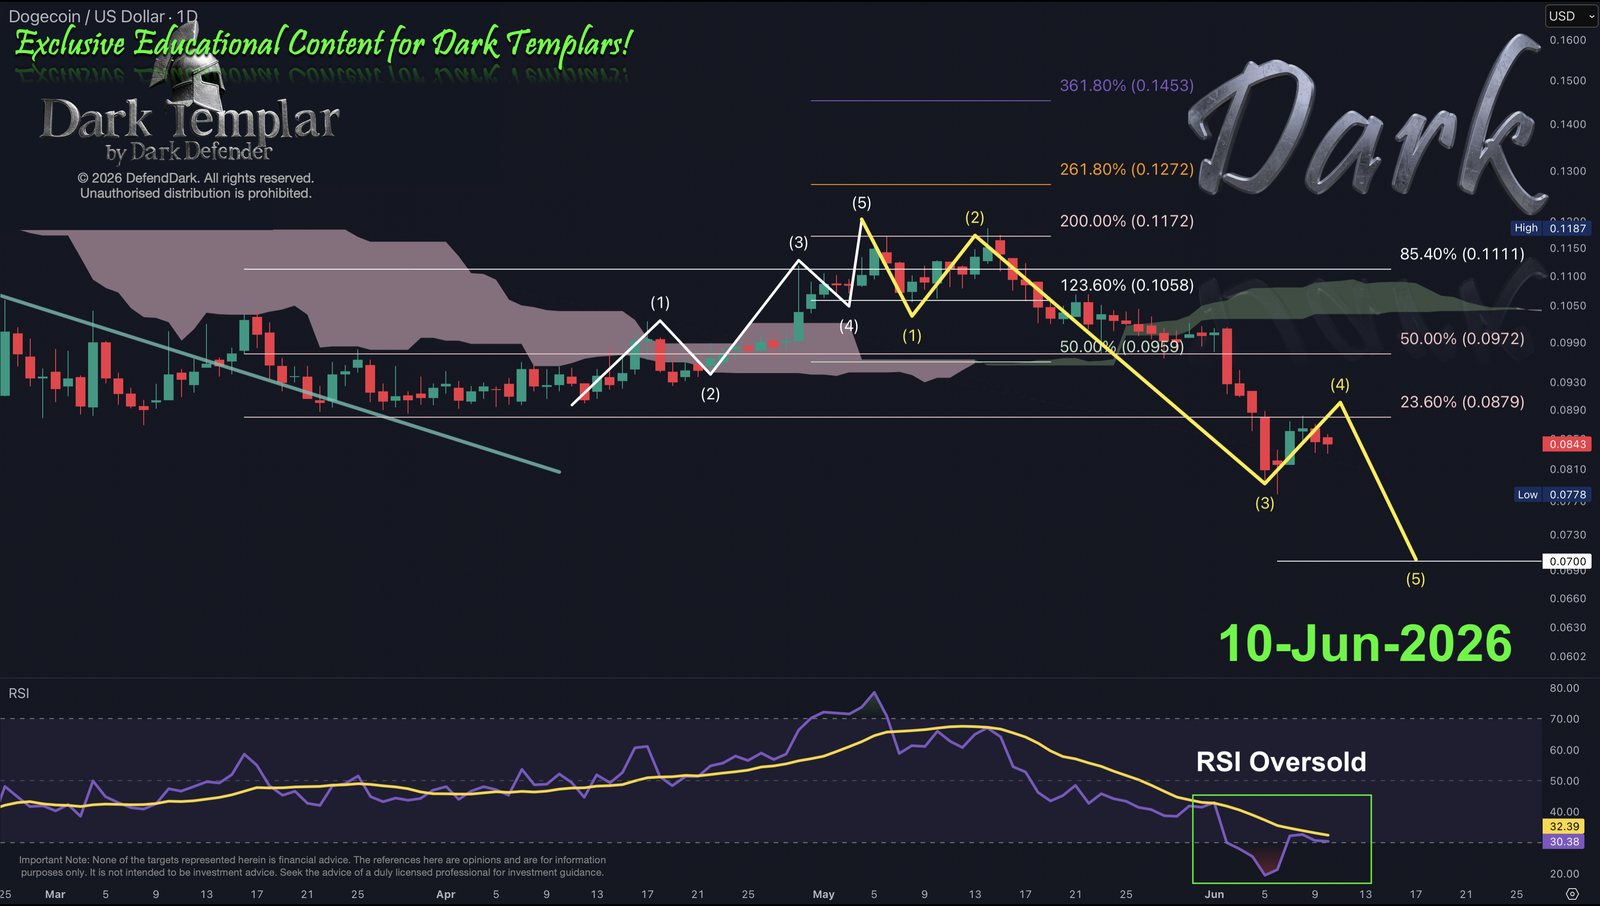
A B-wave top and the correction that followed — called in advance
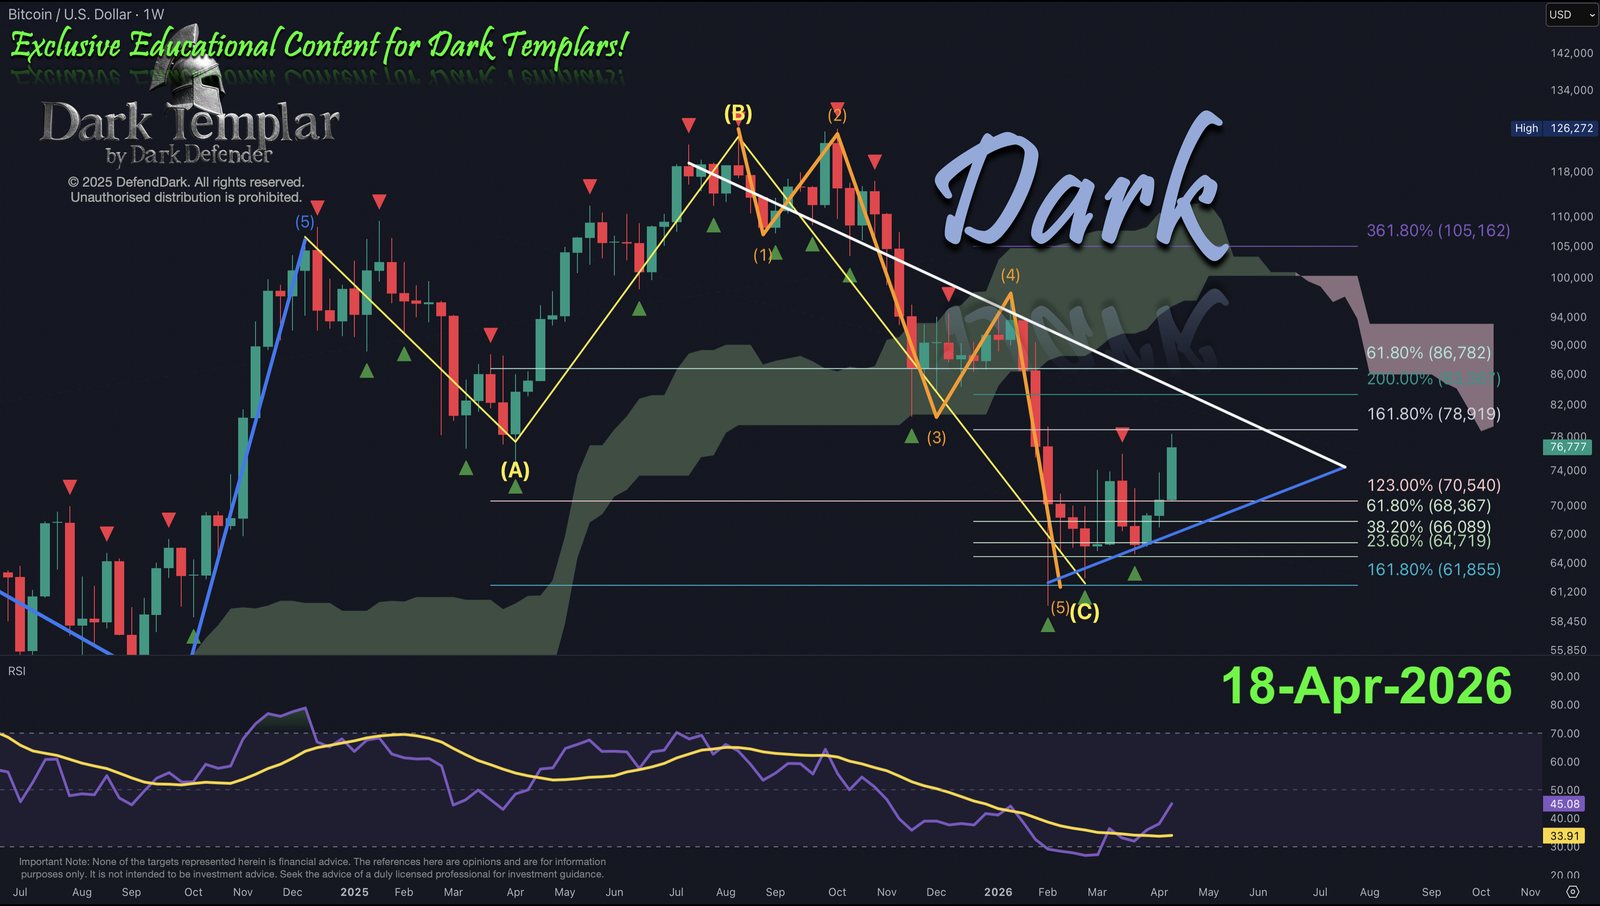
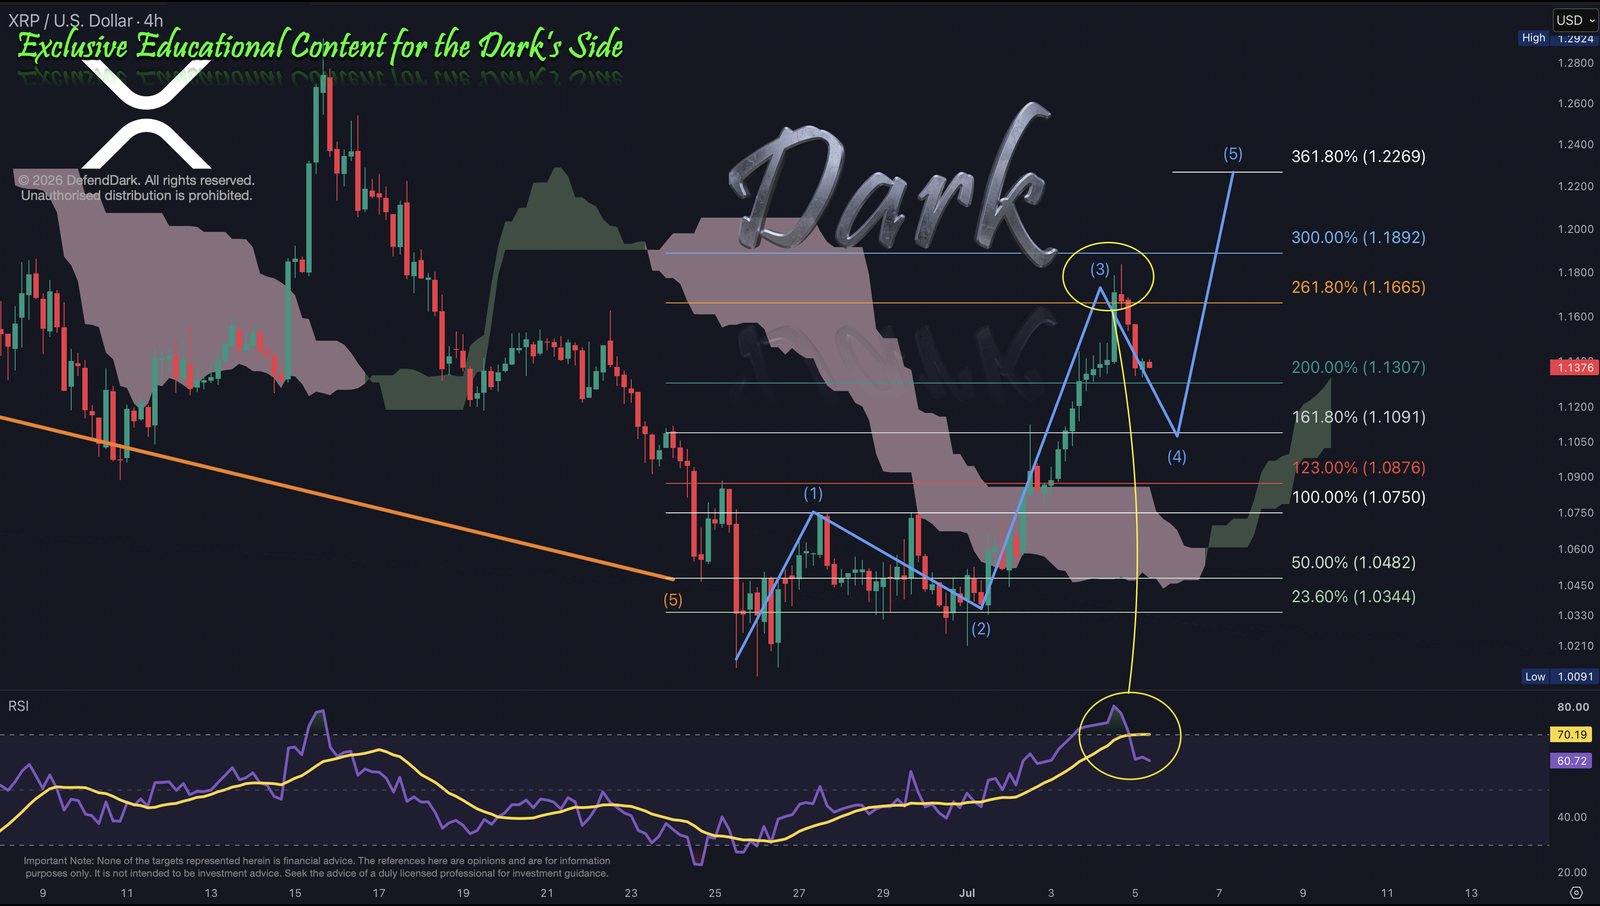
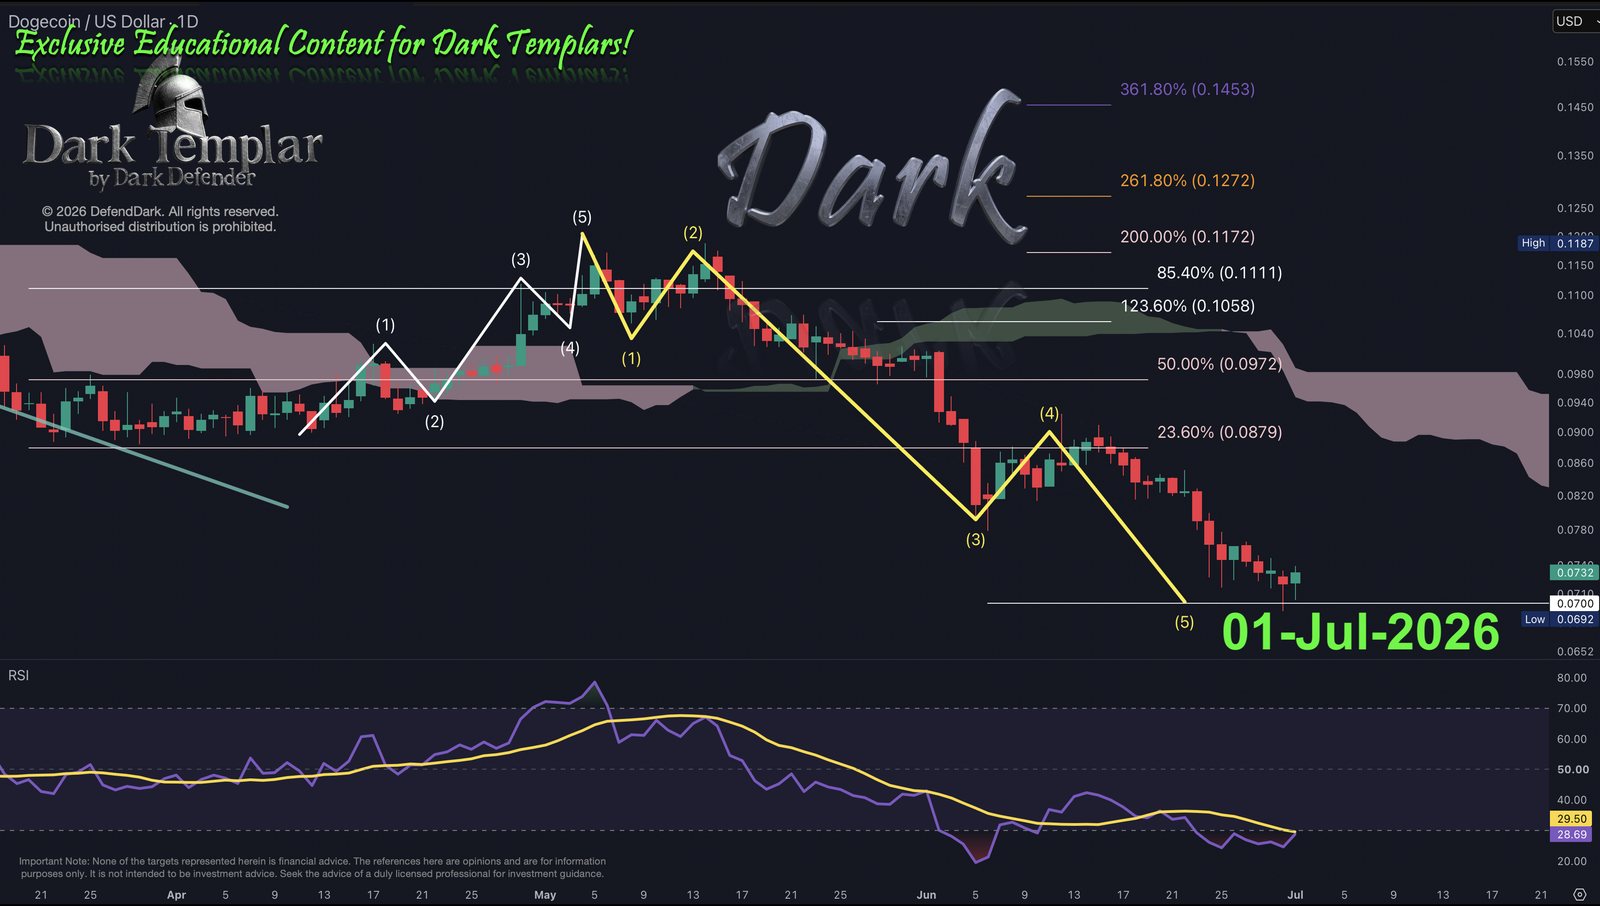
A final Wave 5 flush, hit to the level
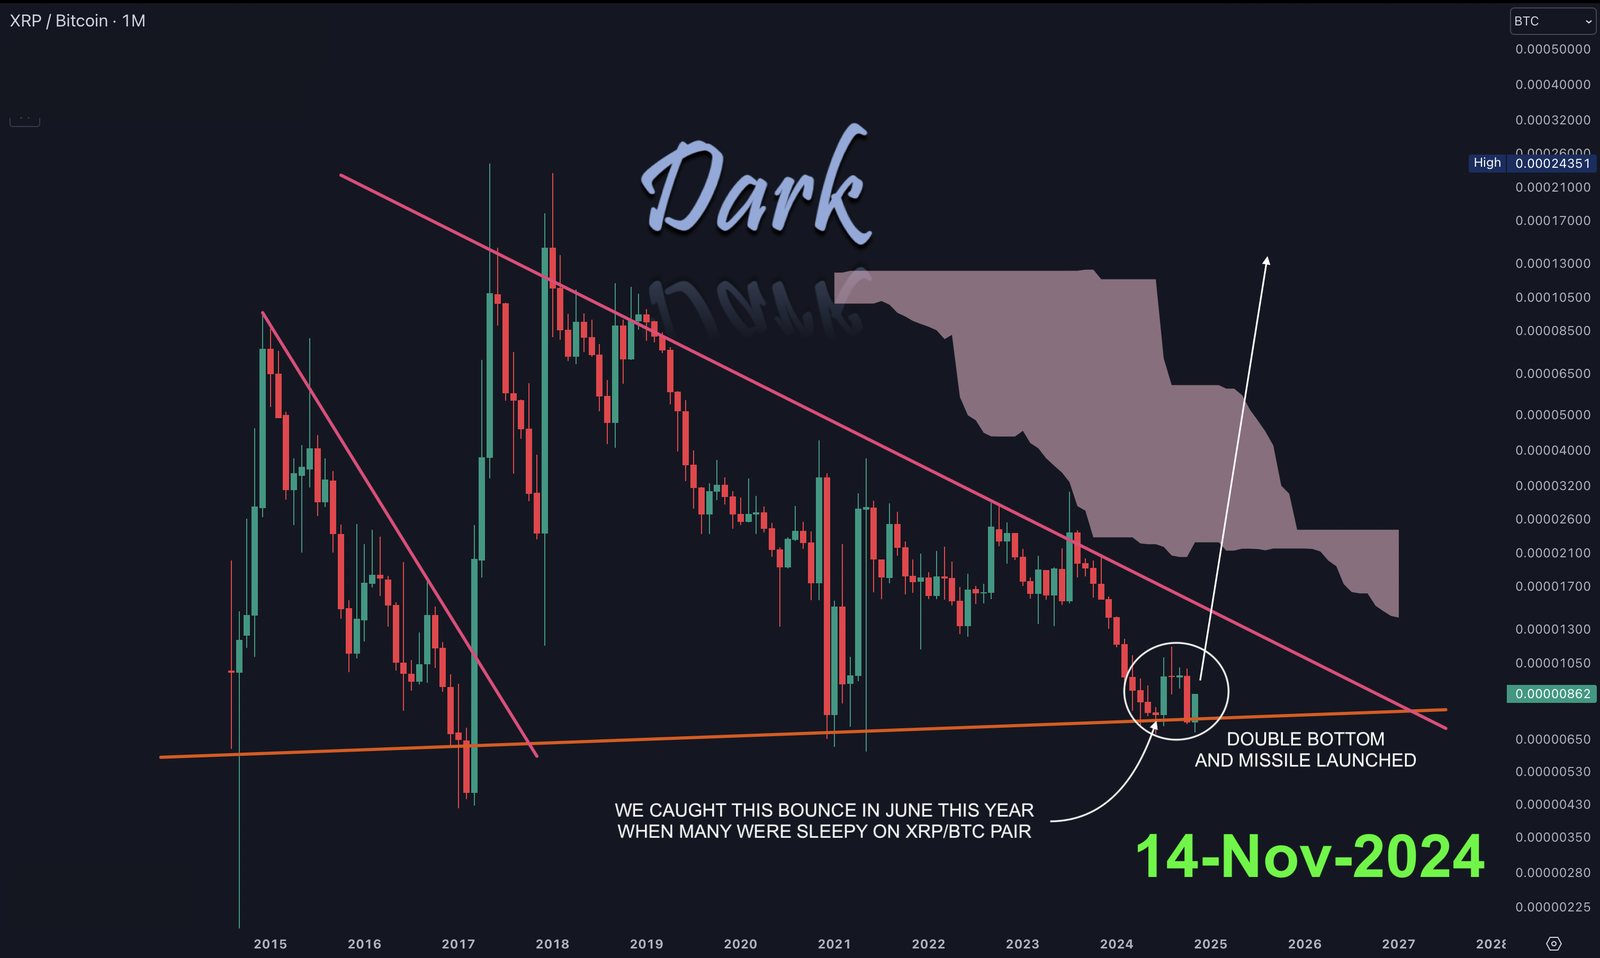
A double bottom spotted while the pair was ignored — then a 4x
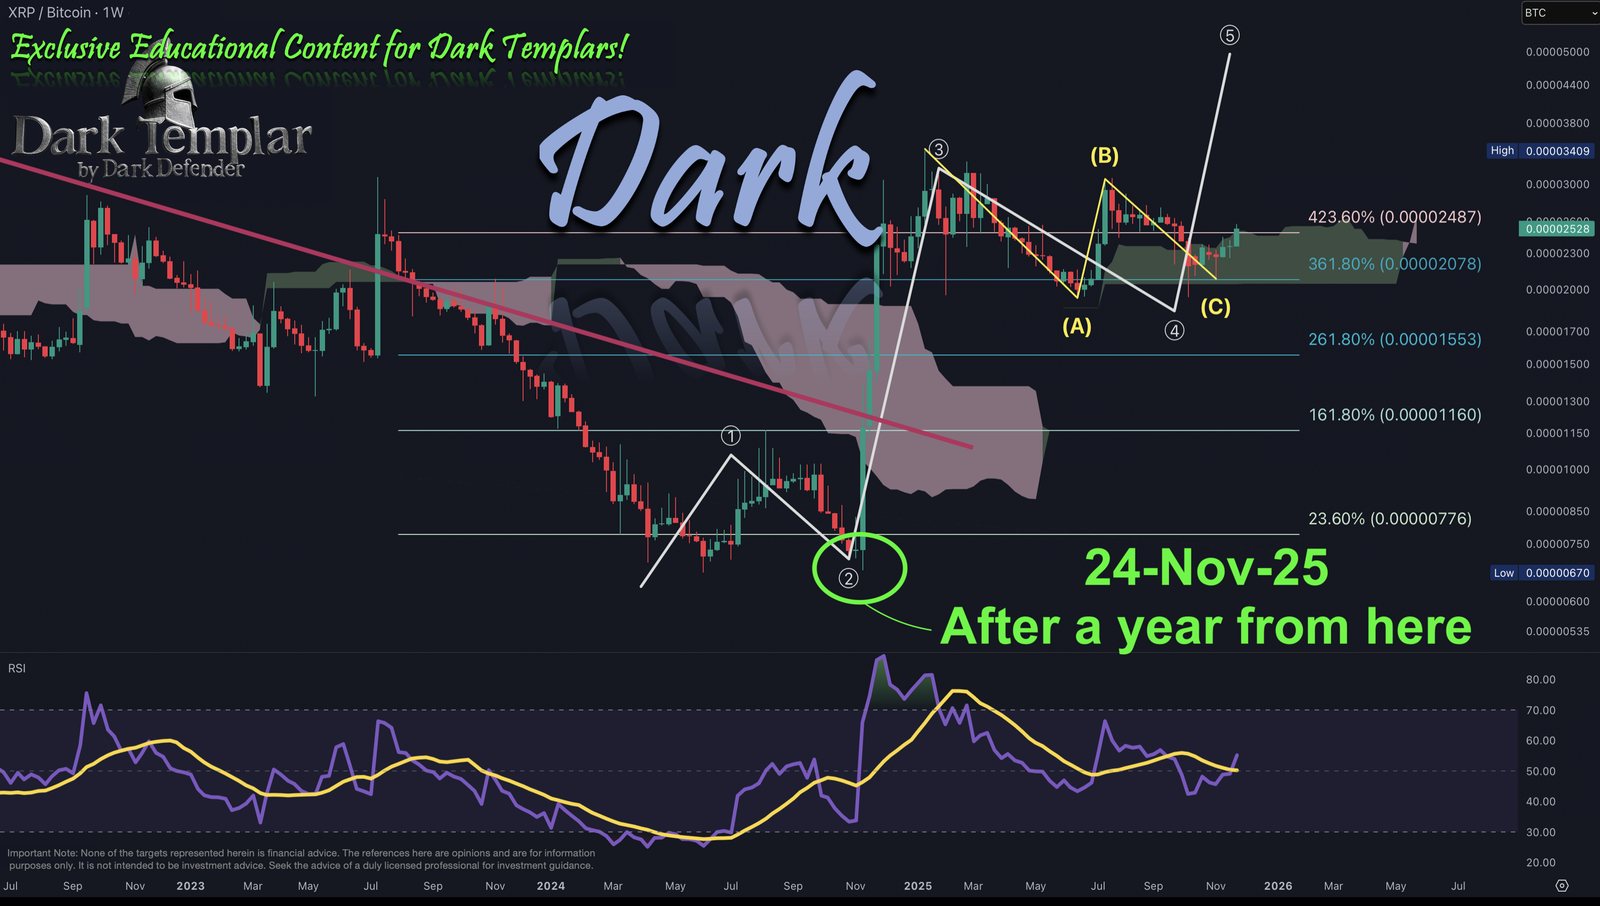
Resistance broken, then a textbook five-wave advance